Disposable Email
As mentioned in the privacy policy about account registration, users are allowed to register on Silverspoon services using email address from any disposable email service as a form of privacy protection, if needed.
Getting Started
Because the services we mention below are external services; We will not provide any support related to those services, like how to do this or customize that. Although paid technical support may be available by us. Please make an inquiry beforehand.
This document will only briefly explain how to use the disposable email service. Short disclaimer that I am not affiliated with or sponsored by any of the service providers I write about here. Please do your own research if needed.
Easy Way
This section will discuss about easy ways to use the disposable email service. No special skills are required and there are no costs involved, but usually the inbox is not secure because it can be accessed publicly, literally by anyone who knows.
Technical notes: The email will be stored into the server owned by the disposable email service provider.
- Open Inboxes.
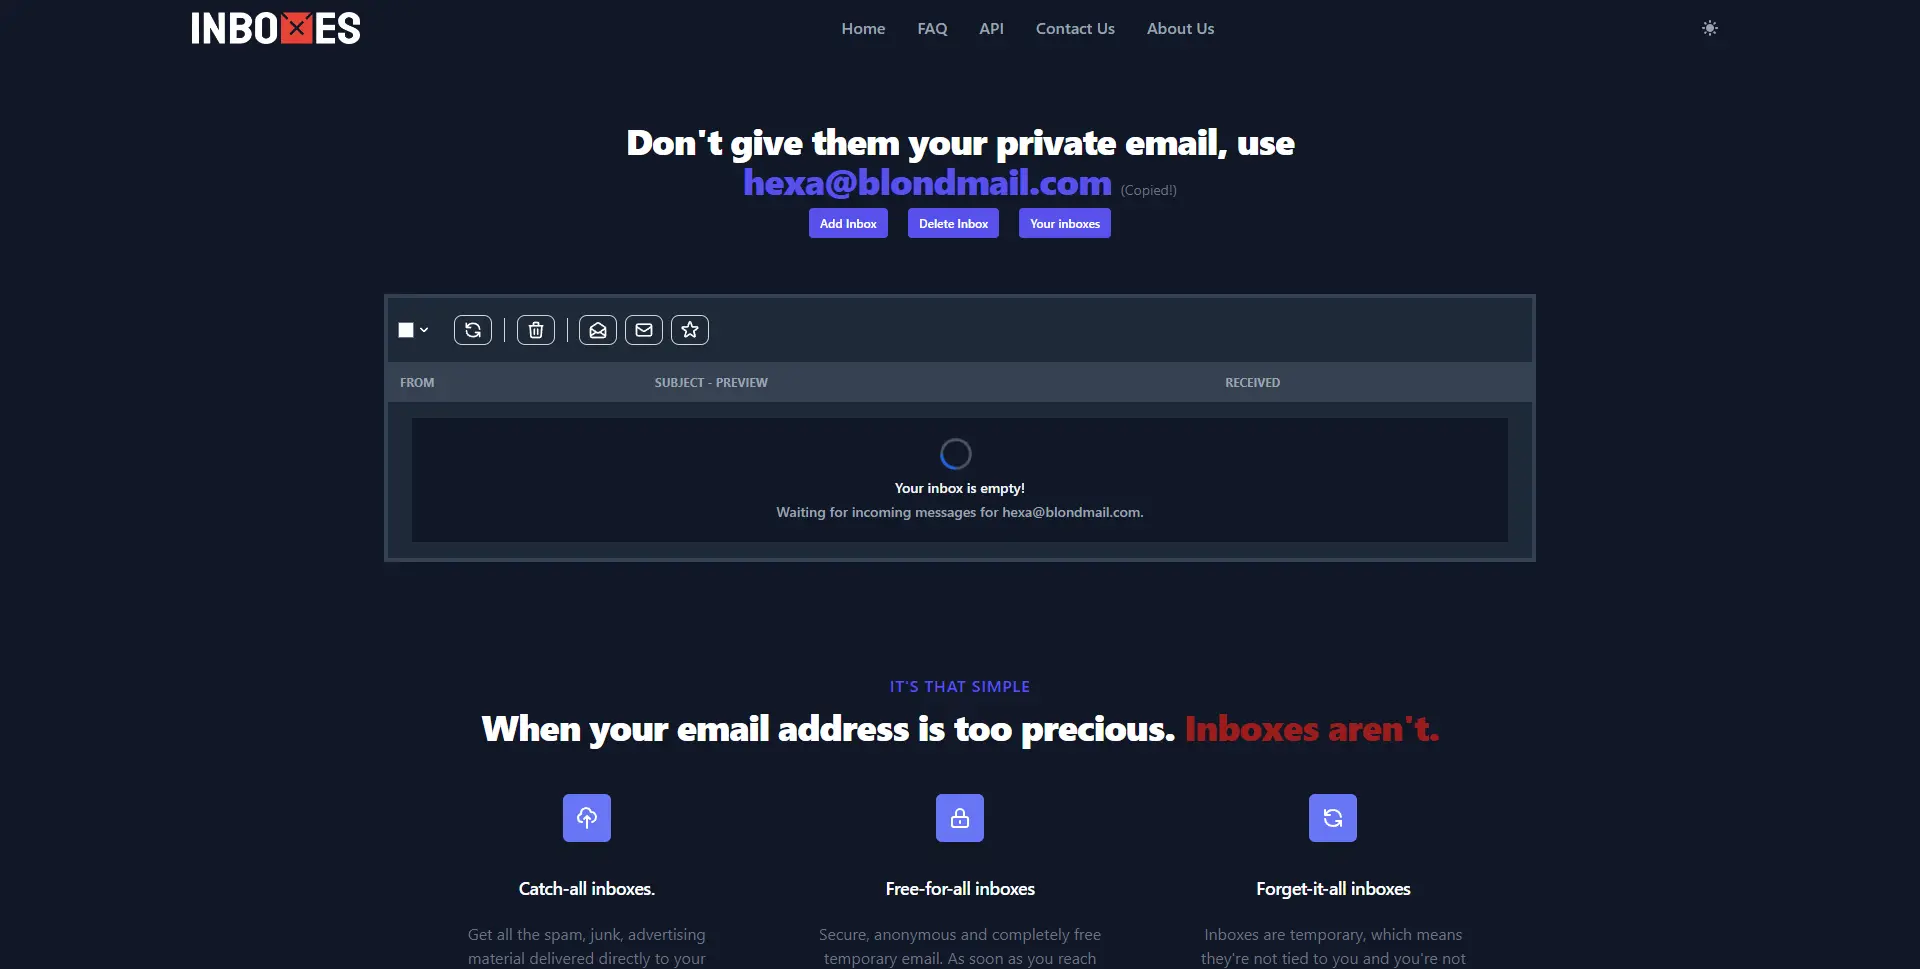 By default you will get a random email address, for example here I get
 hexa@blondmail.com. - I don't recommend using the default email address they provide as it is too generic. Let's customize the address by clicking the "Add Inbox" button.
 Later we will be given the option to determine our own email address. For example here I choose
 wakasilverman@guysmail.comas the email address. - Sit tight and use this email address to register on various sites.
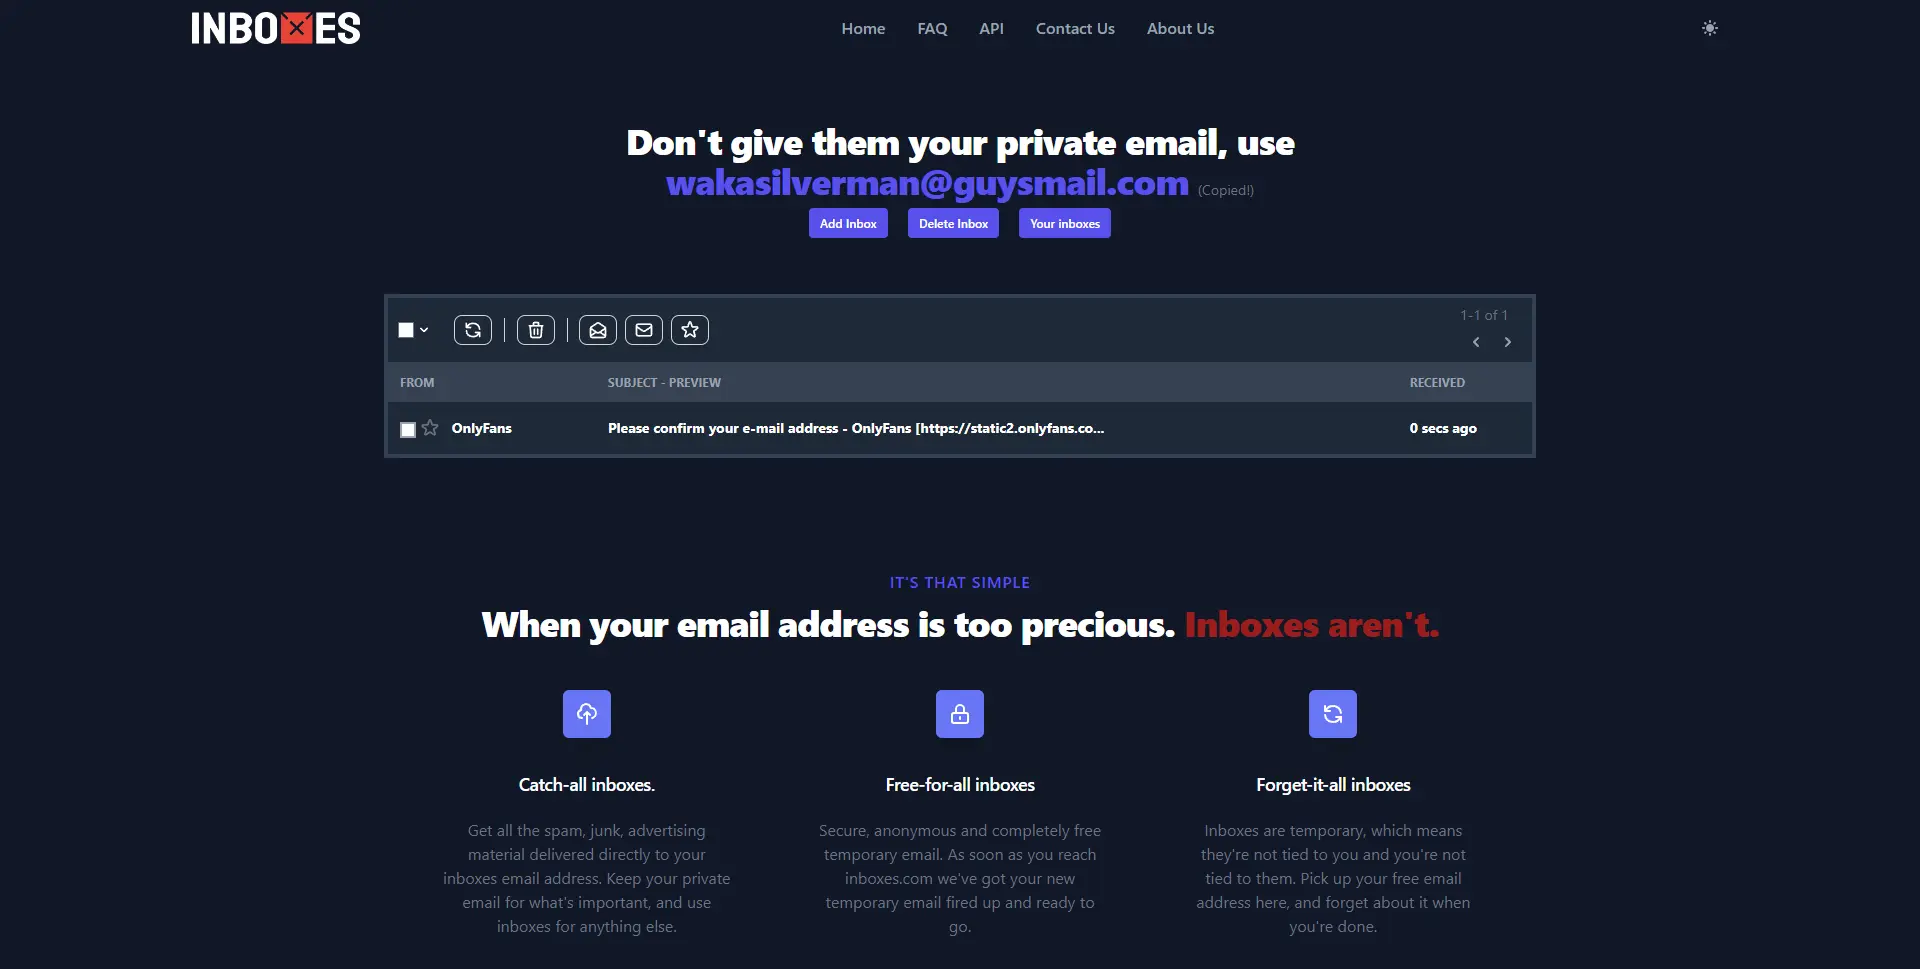 Just like any other email system, you simply press the refresh button if you want to check your inbox.
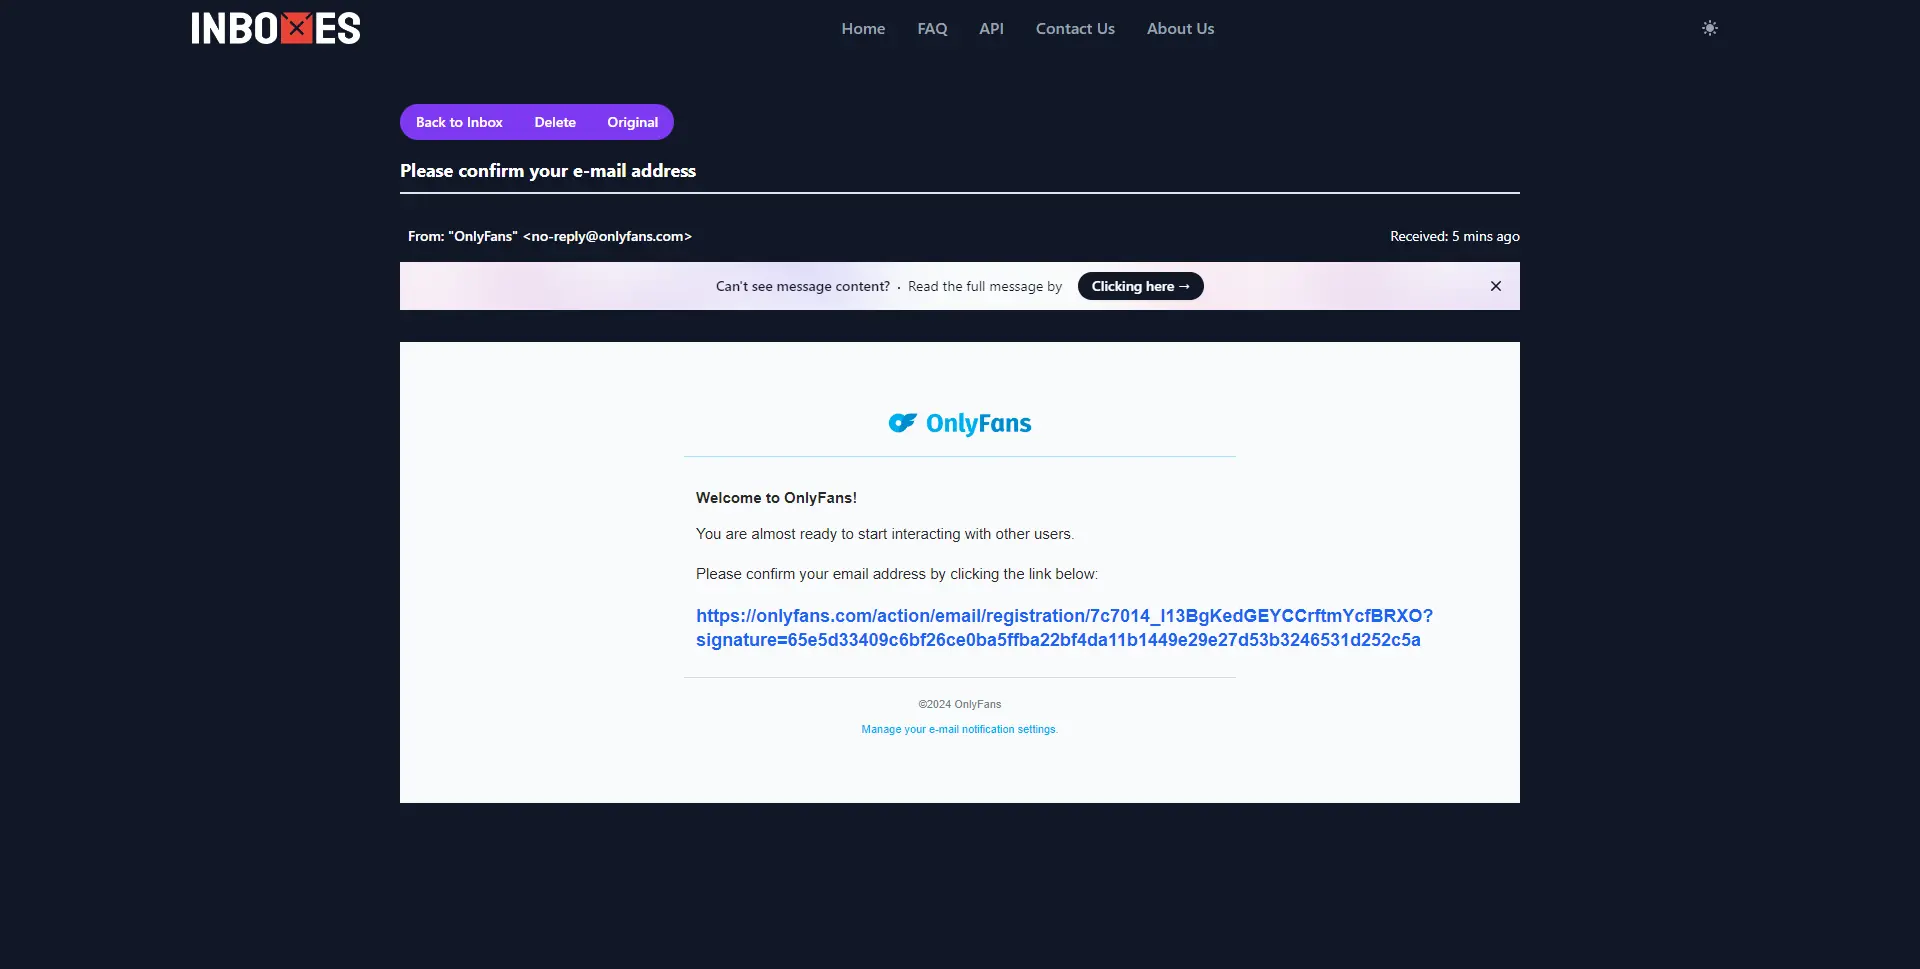 You can also open the email if you want to see the content.
 - When you want to add or move from one inbox to another, use the "Add Inbox" button and repeat from step two.
There are still many disposable email service out there besides Inboxes, but most of them do not provide features for customizing email addresses for free. This is the reason why I highlighted Inboxes as the main choice.
Every disposable email service have their own rules. So please read carefully about important things like how long they keep your inbox, content, attachment limits, etc.
Hard Way
This section will discuss about somewhat hard ways to use the disposable email service, as this method requires a few interaction with some things that you may rarely encounter. Usually the inbox is more secure because it can only be accessed privately. This section usually requires the purchase of a good or service.
Technical notes: The email will be stored into the server owned by your own email service provider.
Option 1: Email Forwarder by Domain Registrar
If you're focused on branding or identity, there's no harm in buying a domain right now. You can use this domain as an alias for your landing page, such as when using Carrd or Wix.
In addition to being just an alias for your landing page, the domain can also be used as an alias for your email address, which can then act as your personal disposable email address.
When buying a domain, some domain registrars provide email forwarding for free. Usually the number of aliases is limited but still sufficient for various purposes.
Example on Namecheap
Some of the main domains I own are registered through Namecheap. And based on my experience, Namecheap provides up to 100 forwarding email addresses for free.
Technical notes: The example domain that I use is
naha.dev.
- Click "Manage" button to configure your own domain from Namecheap panel.

- To utilize their email forwarding you are required to use either BasicDNS, PremiumDNS or their FreeDNS in the "Domain" tab section.
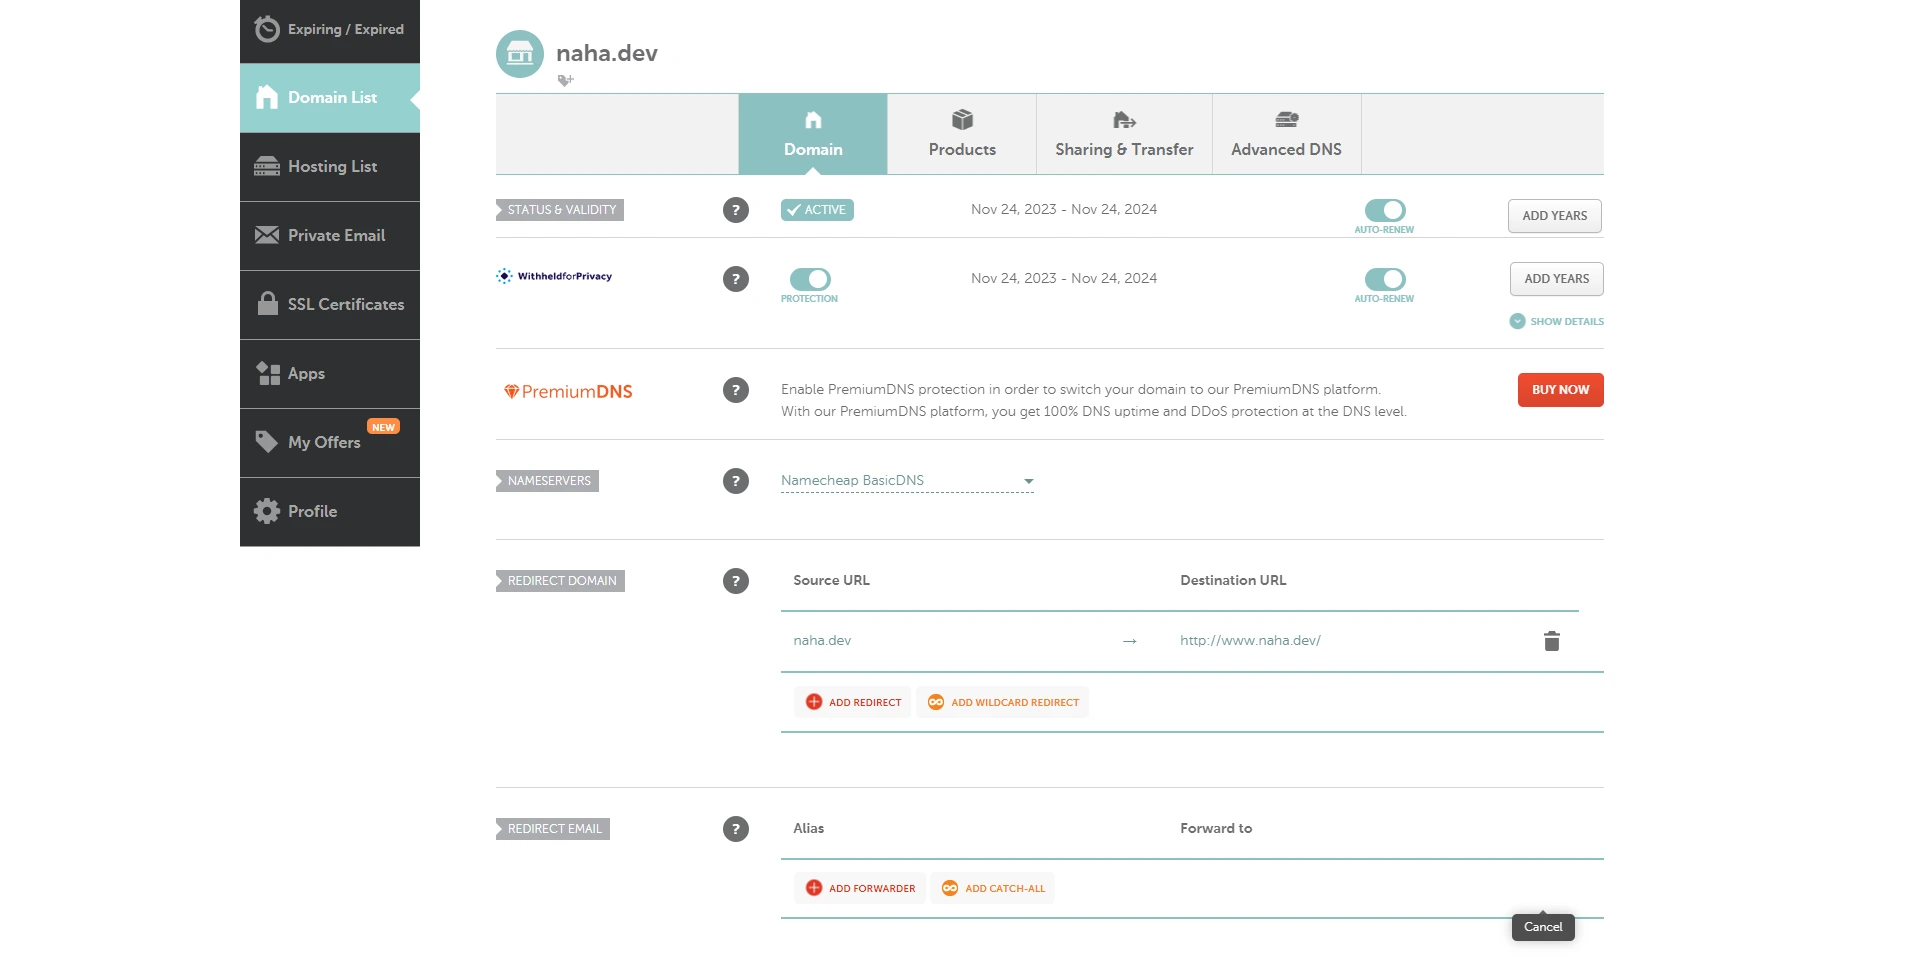 For example, here I use BasicDNS.
 - In the "Advance DNS" tab, specifically in the mail setting section, you have to choose "Email Forwarding."
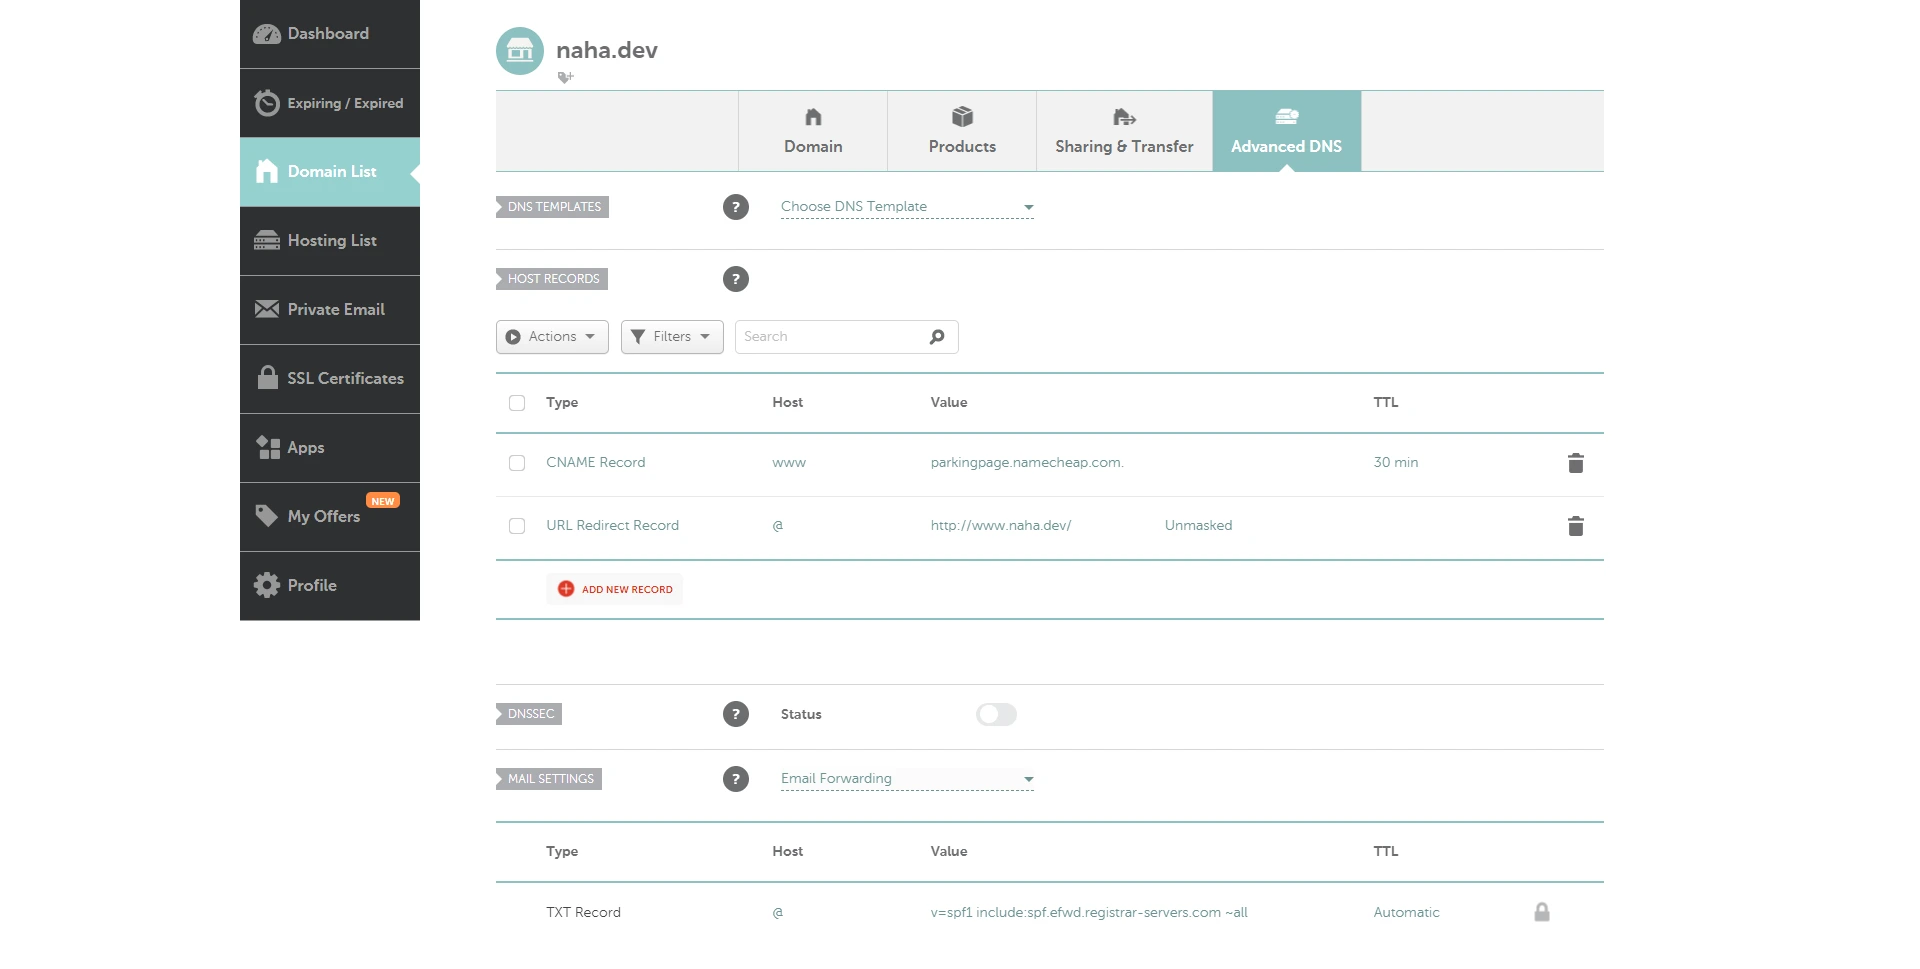
- Go back to the "Domain" tab, under the "Redirect Email" section, you can start adding aliases and their destinations using the "Add Forwarder" button.
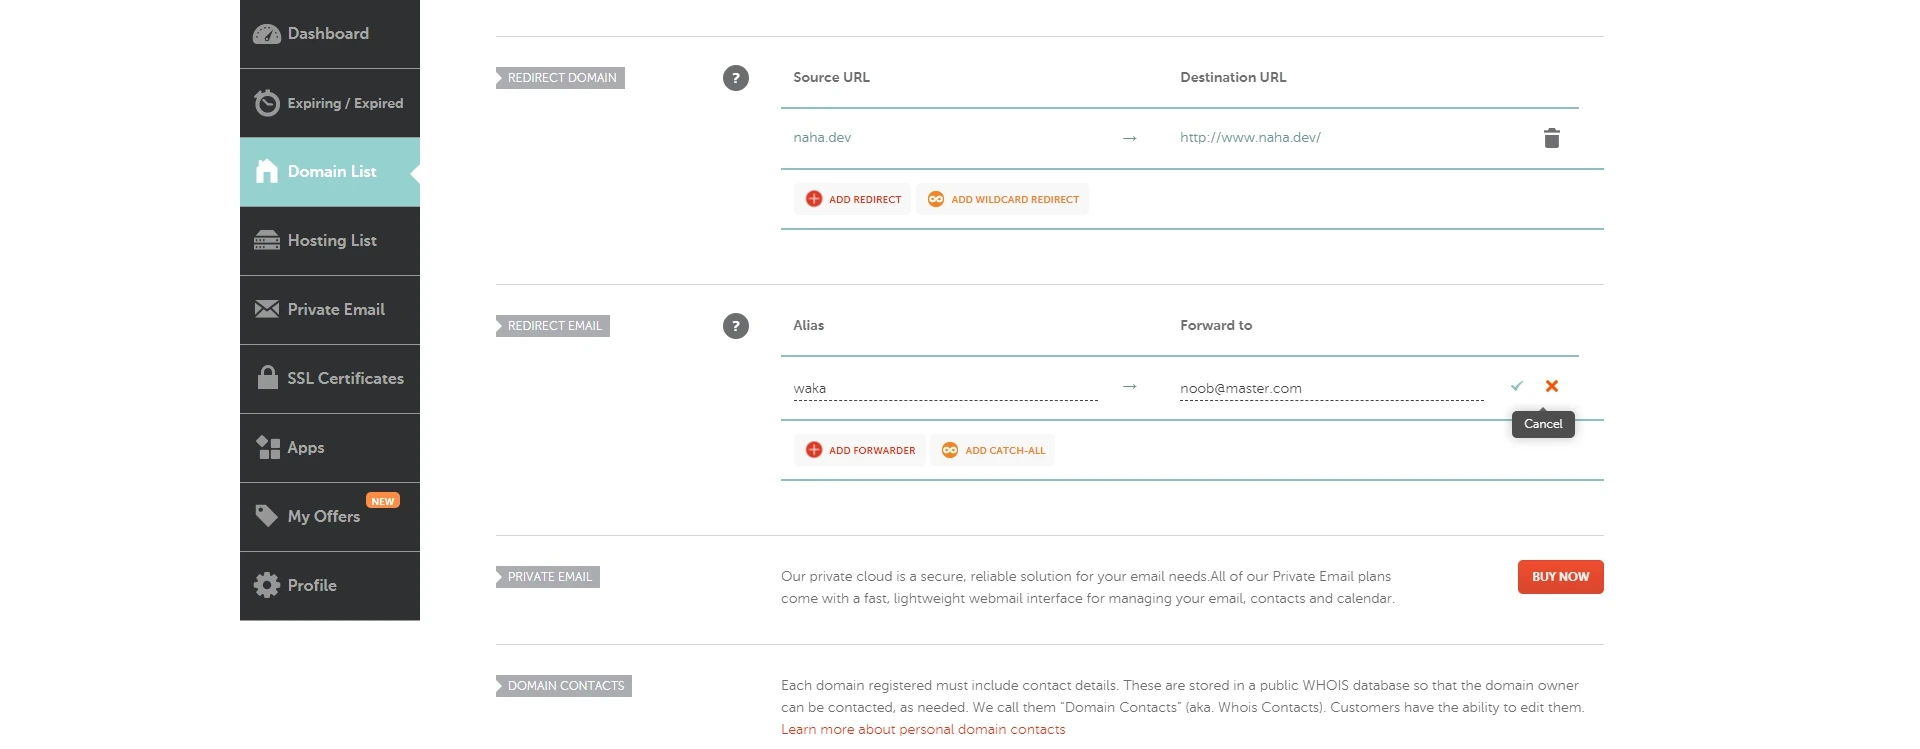 For example, if I fill in as above, the email from
 waka@naha.devwill be sent tonoob@master.com. - From the "Redirect Email" section as above, you can also populate random aliases and their destinations using the "Add Catch-All" button.
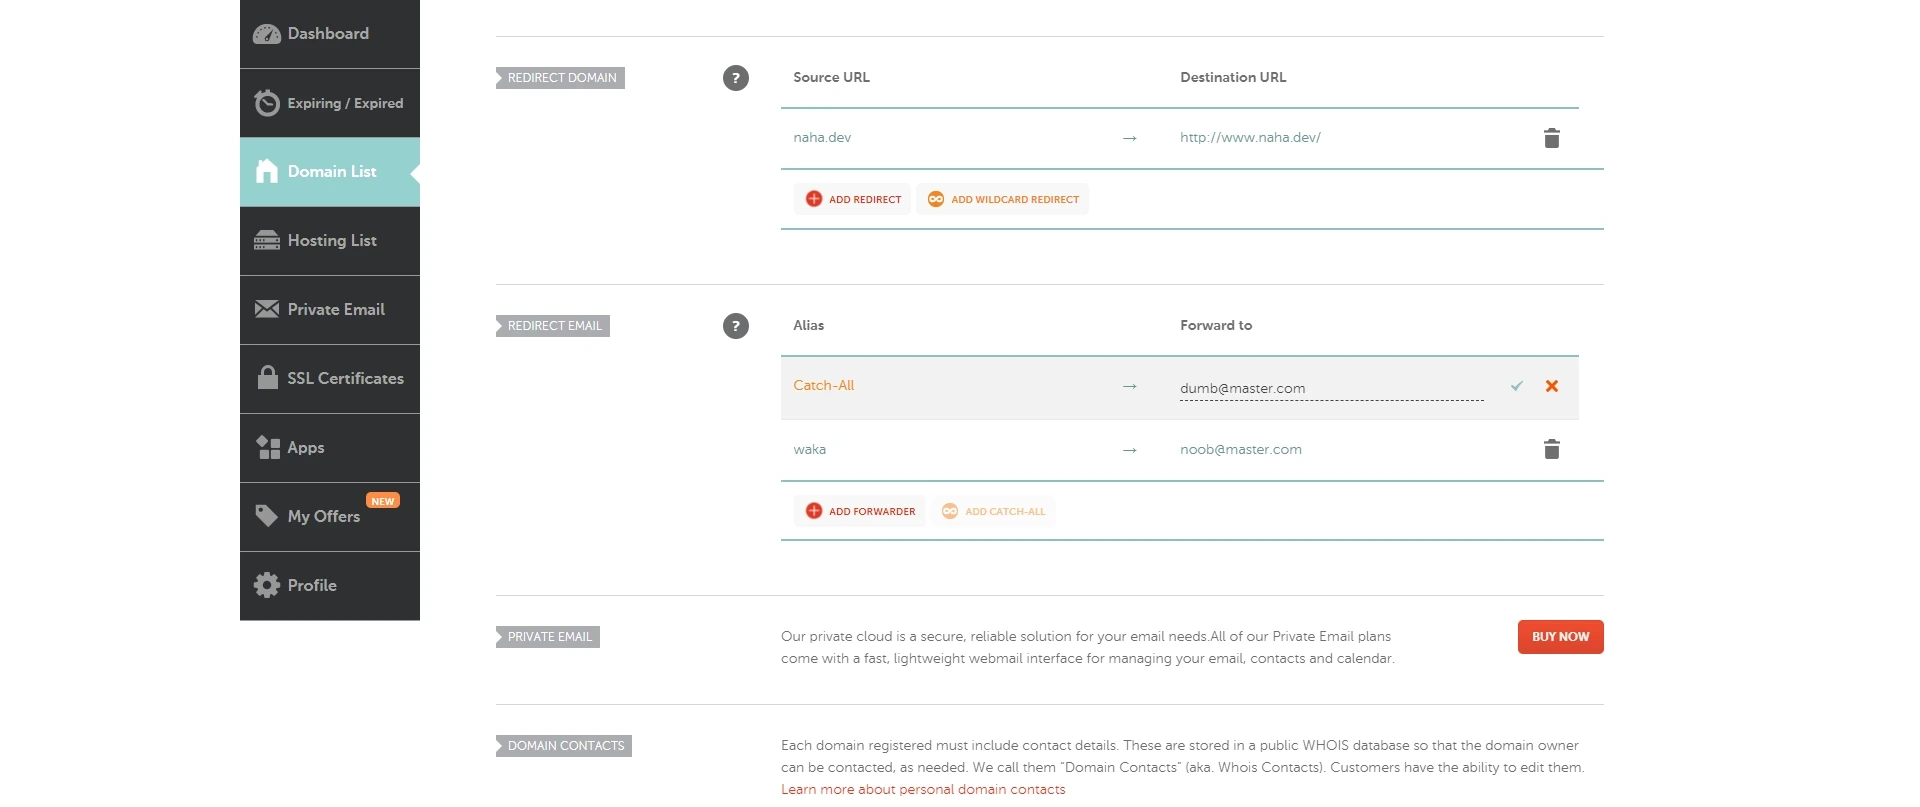 For example, if I fill in as above, all email aliases that are not set up will be sent to
 dumb@master.com. The alias that is already set likewaka@naha.devwill still be sent to it's destination whichnoob@master.com.
Before making a purchase, please consult with your domain registrar regarding technical issues, such as whether they provide free email forwarding or not, how to perform basic DNS setup, limitations, etc.
Option 2: Email Forwarder by Cloudflare
Let's say that the domain prices at each registrar are different. Then you choose a registrar that offers cheap prices, but unfortunately does not provide the email forwarding features. Worry not, because you don't need to throw away that domain. As if this happens, then we will utilize a third party service called Cloudflare.
Technical notes: The example domain that I use is
spn.ink.
- Add a domain to your Cloudflare account.
- Make sure that the nameserver you are using is in accordance with the one specified.
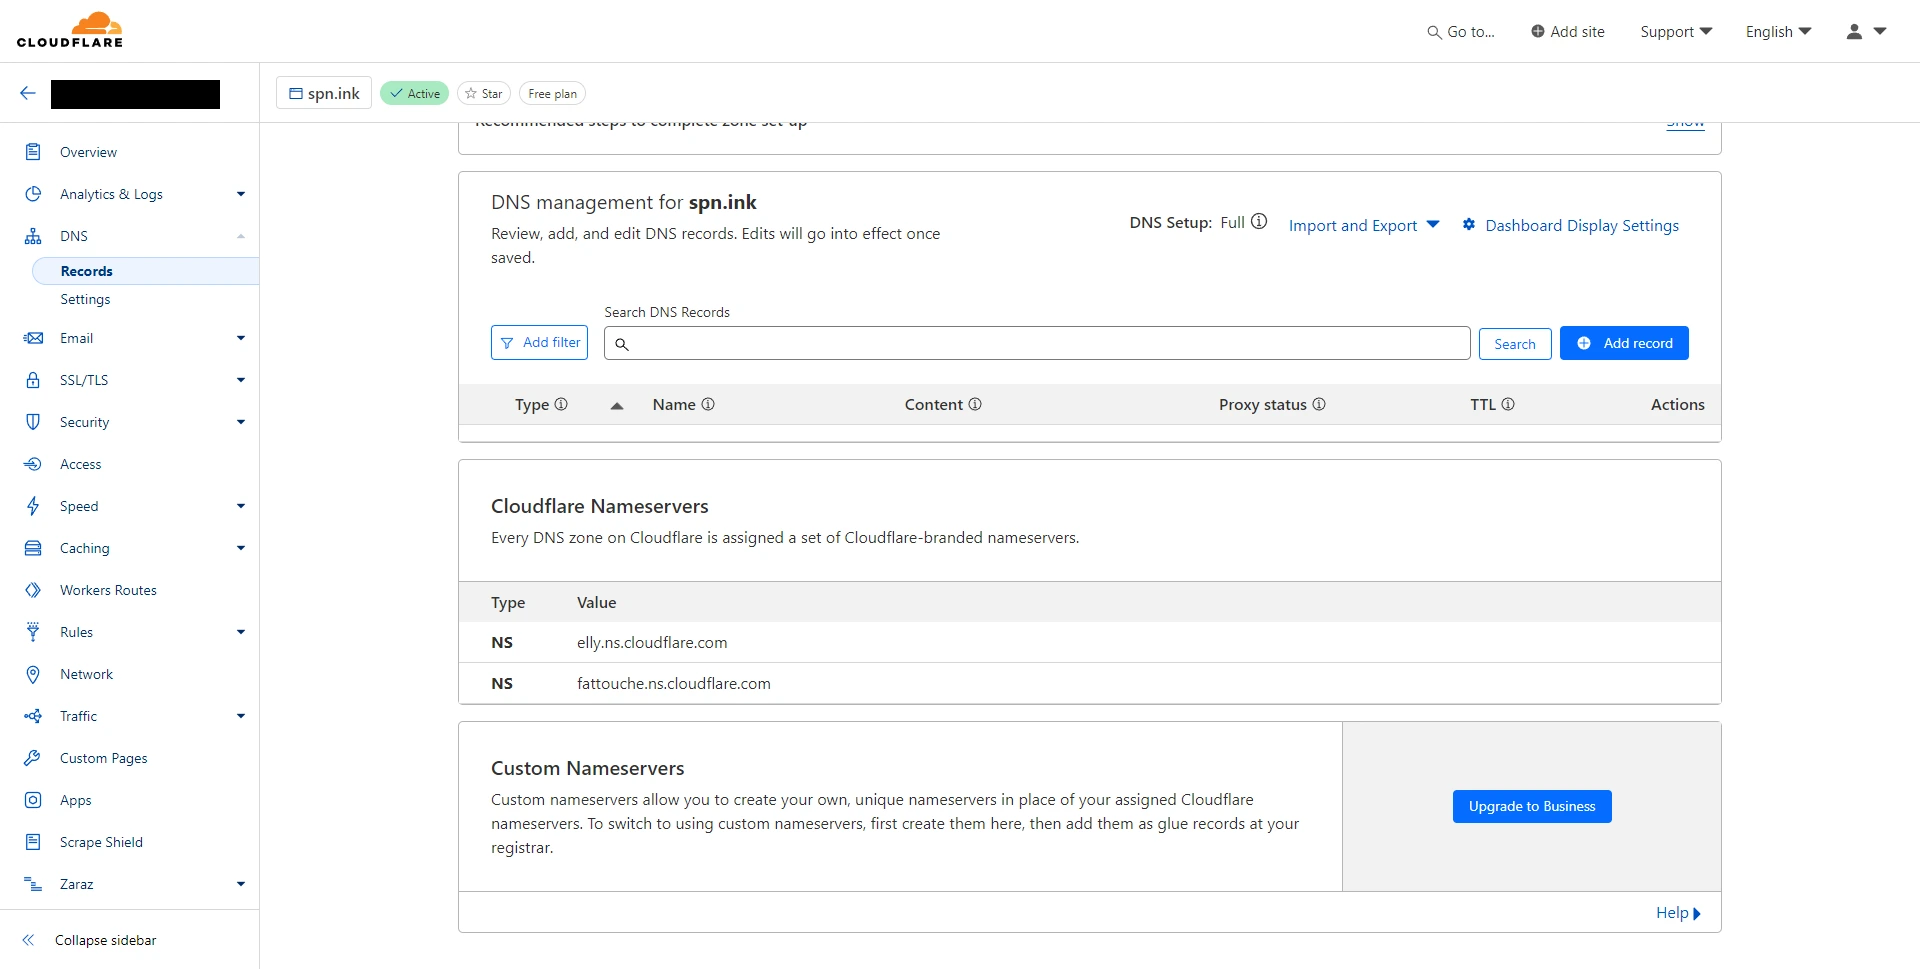 In the "DNS" menu, Cloudflare instructs that the nameservers I should use are
 elly.ns.cloudflare.comandfattouche.ns.cloudflare.com.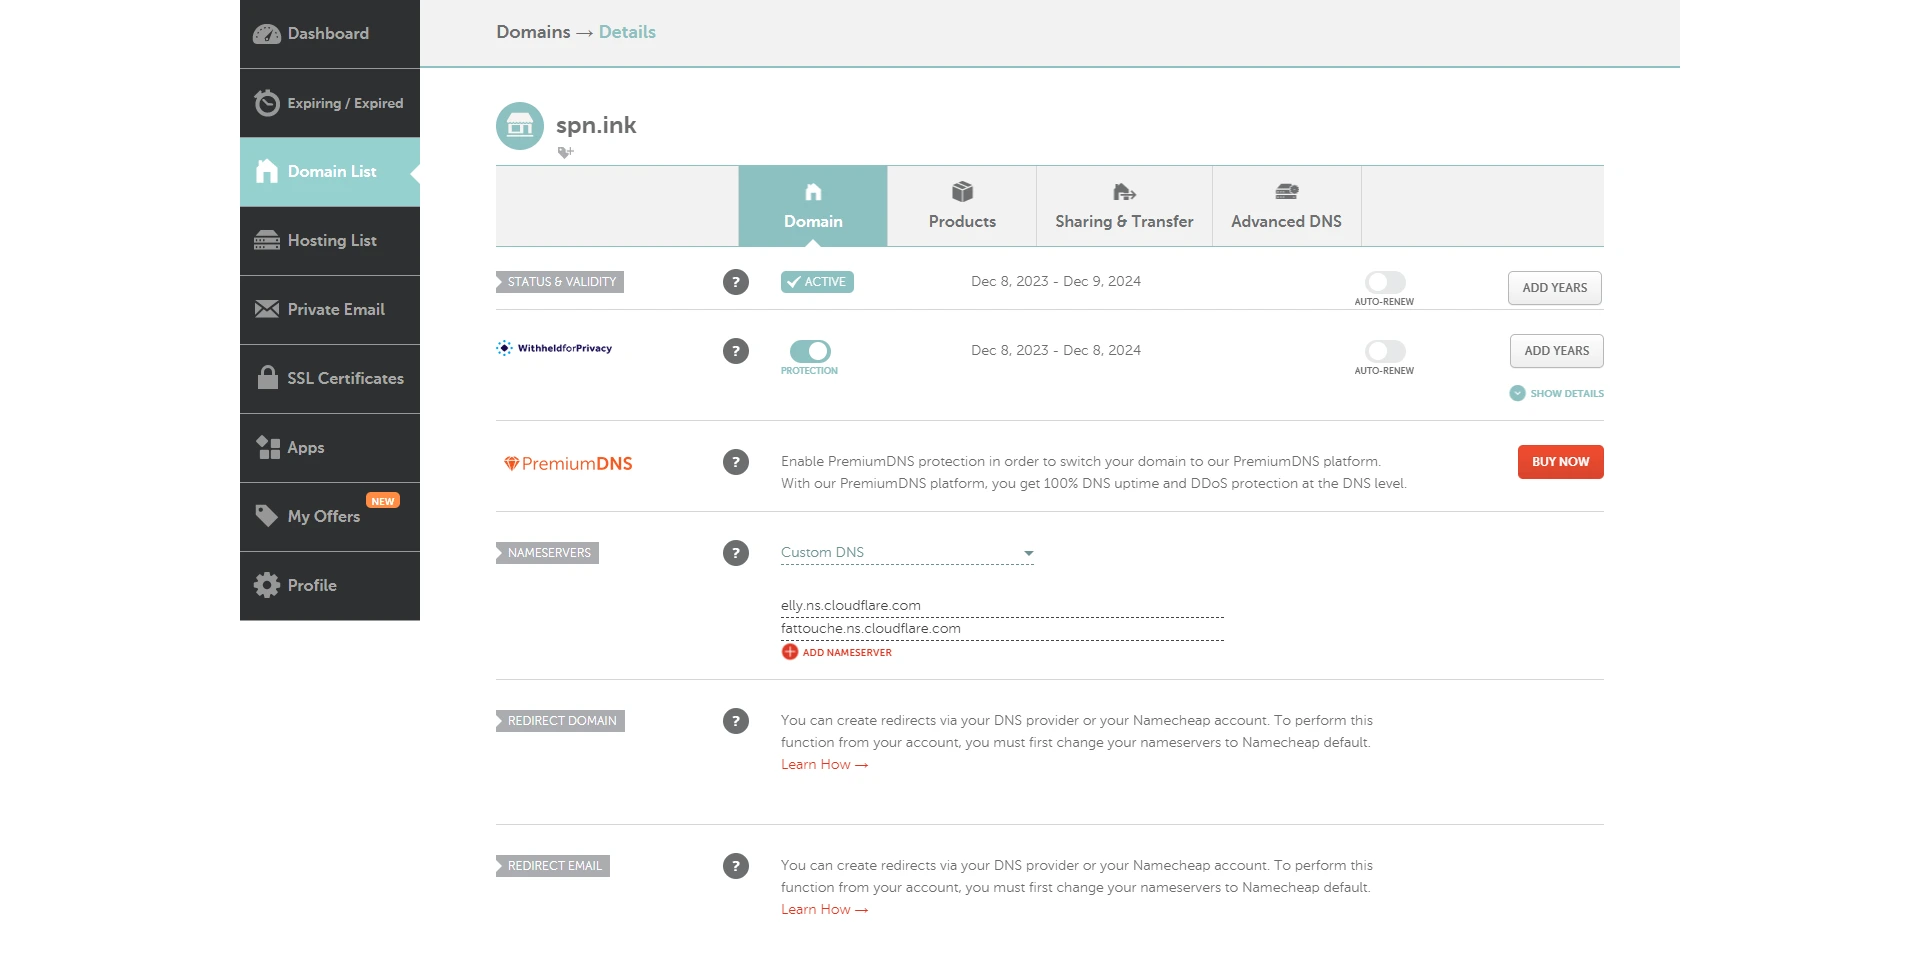 So the nameservers settings in my domain are also
 elly.ns.cloudflare.comandfattouche.ns.cloudflare.com. - After ensuring that the nameserver is correct, now is the time to go to the "Email" menu.
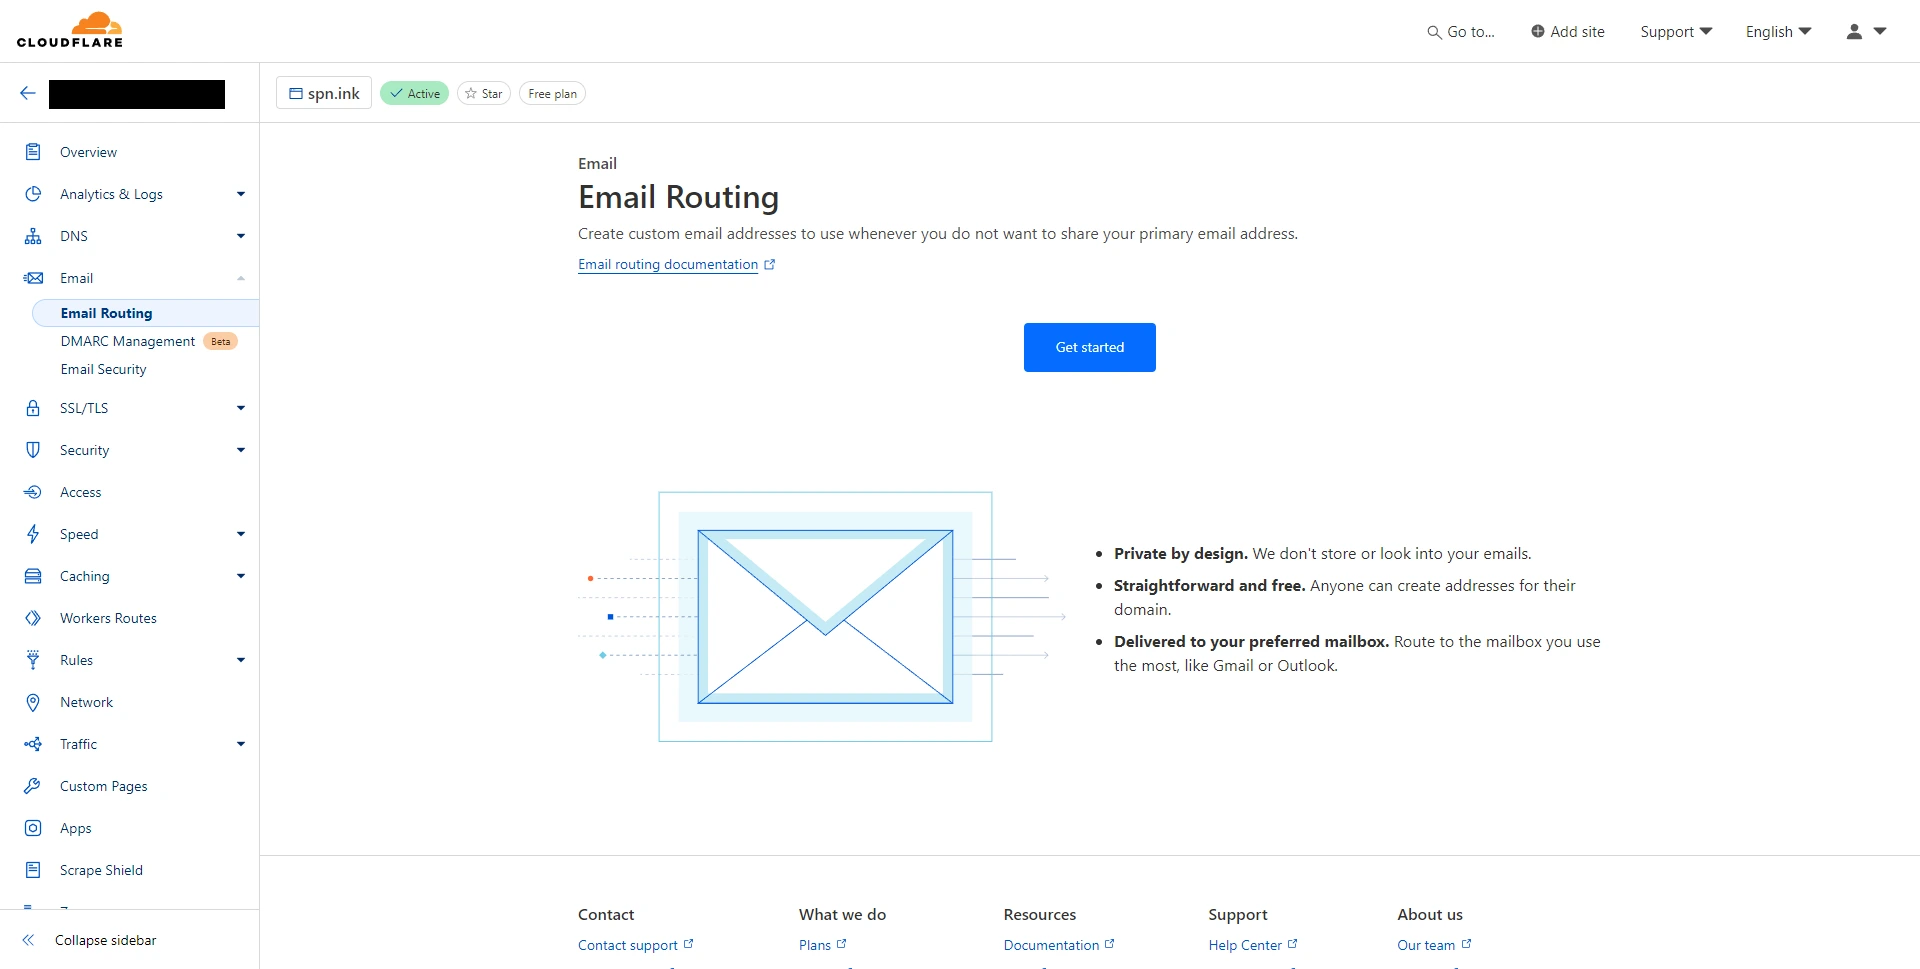 Start setup by pressing the "Get Started" button.
 - Just like usual, fill in the "Custom address" section with the alias you want and fill in the "Destination" section with it's destination.
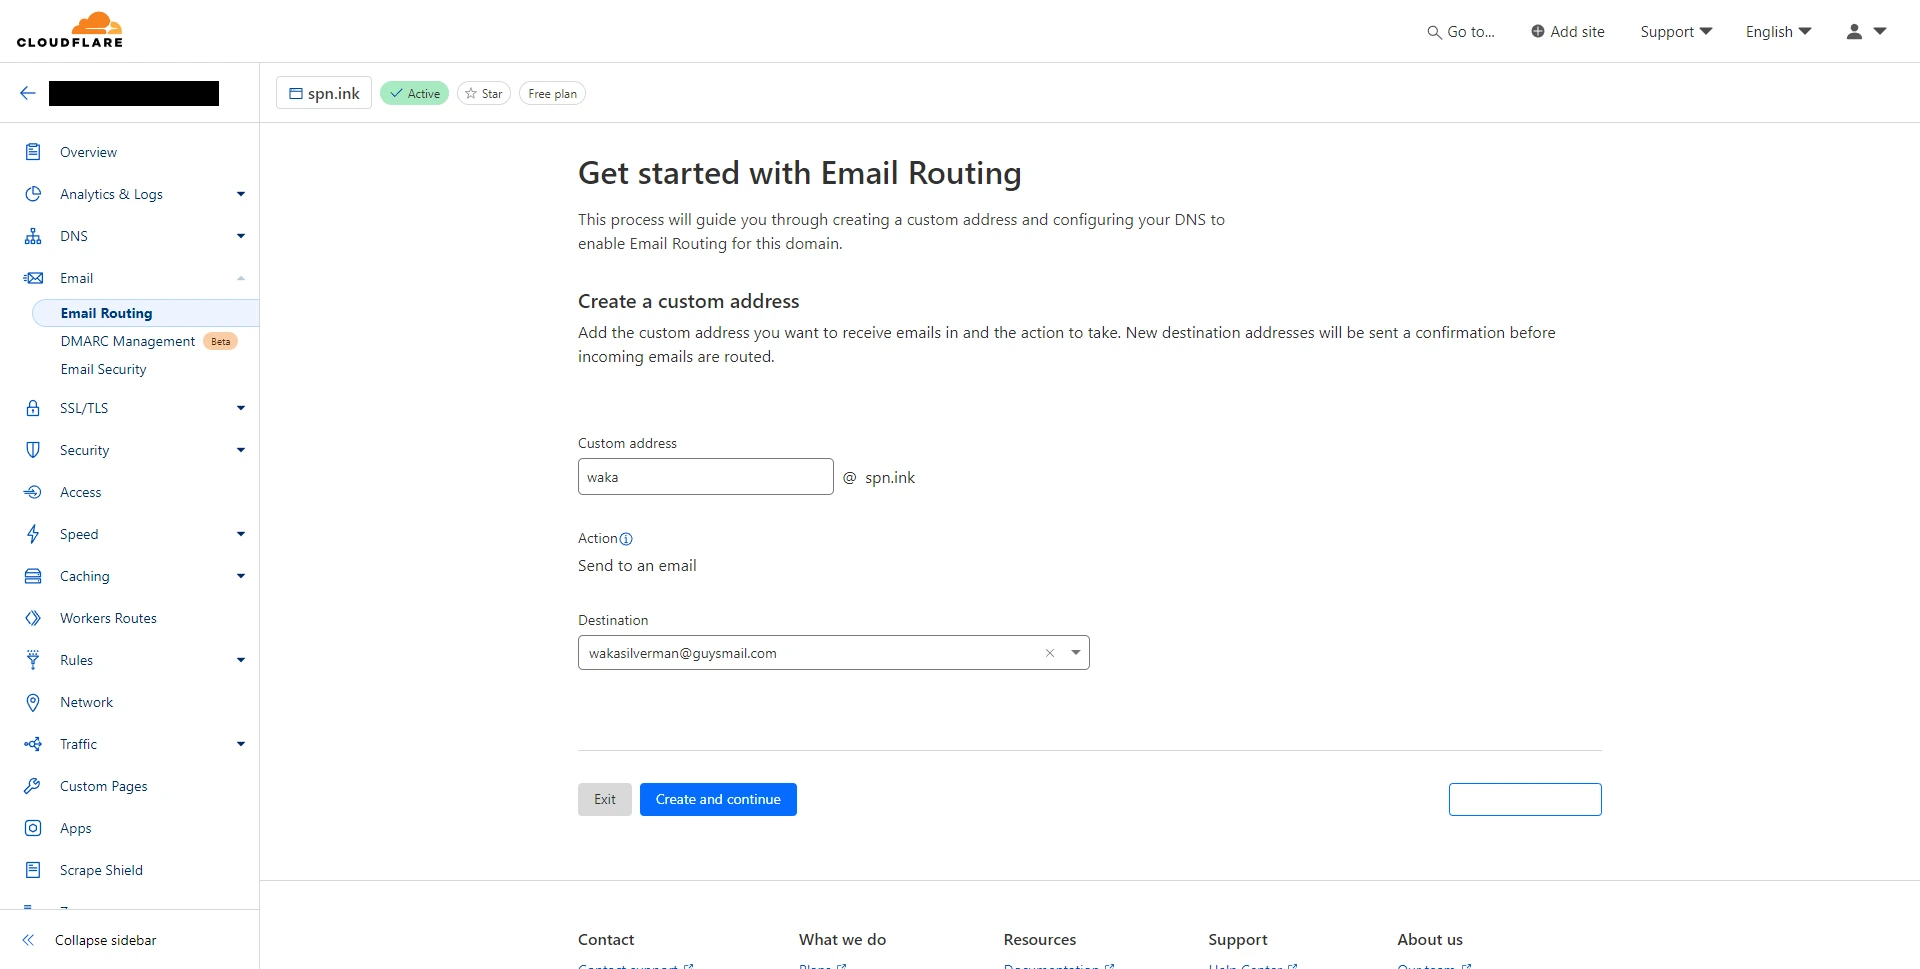 For example, if I fill in as above, the email from
 waka@spn.inkwill be sent towakasilverman@guysmail.com. Click "Create and Continue" to continue. - Check your "destination" email from above, usually Cloudflare will confirm whether you accept the routing or not. Click "Verify email address" to verify.
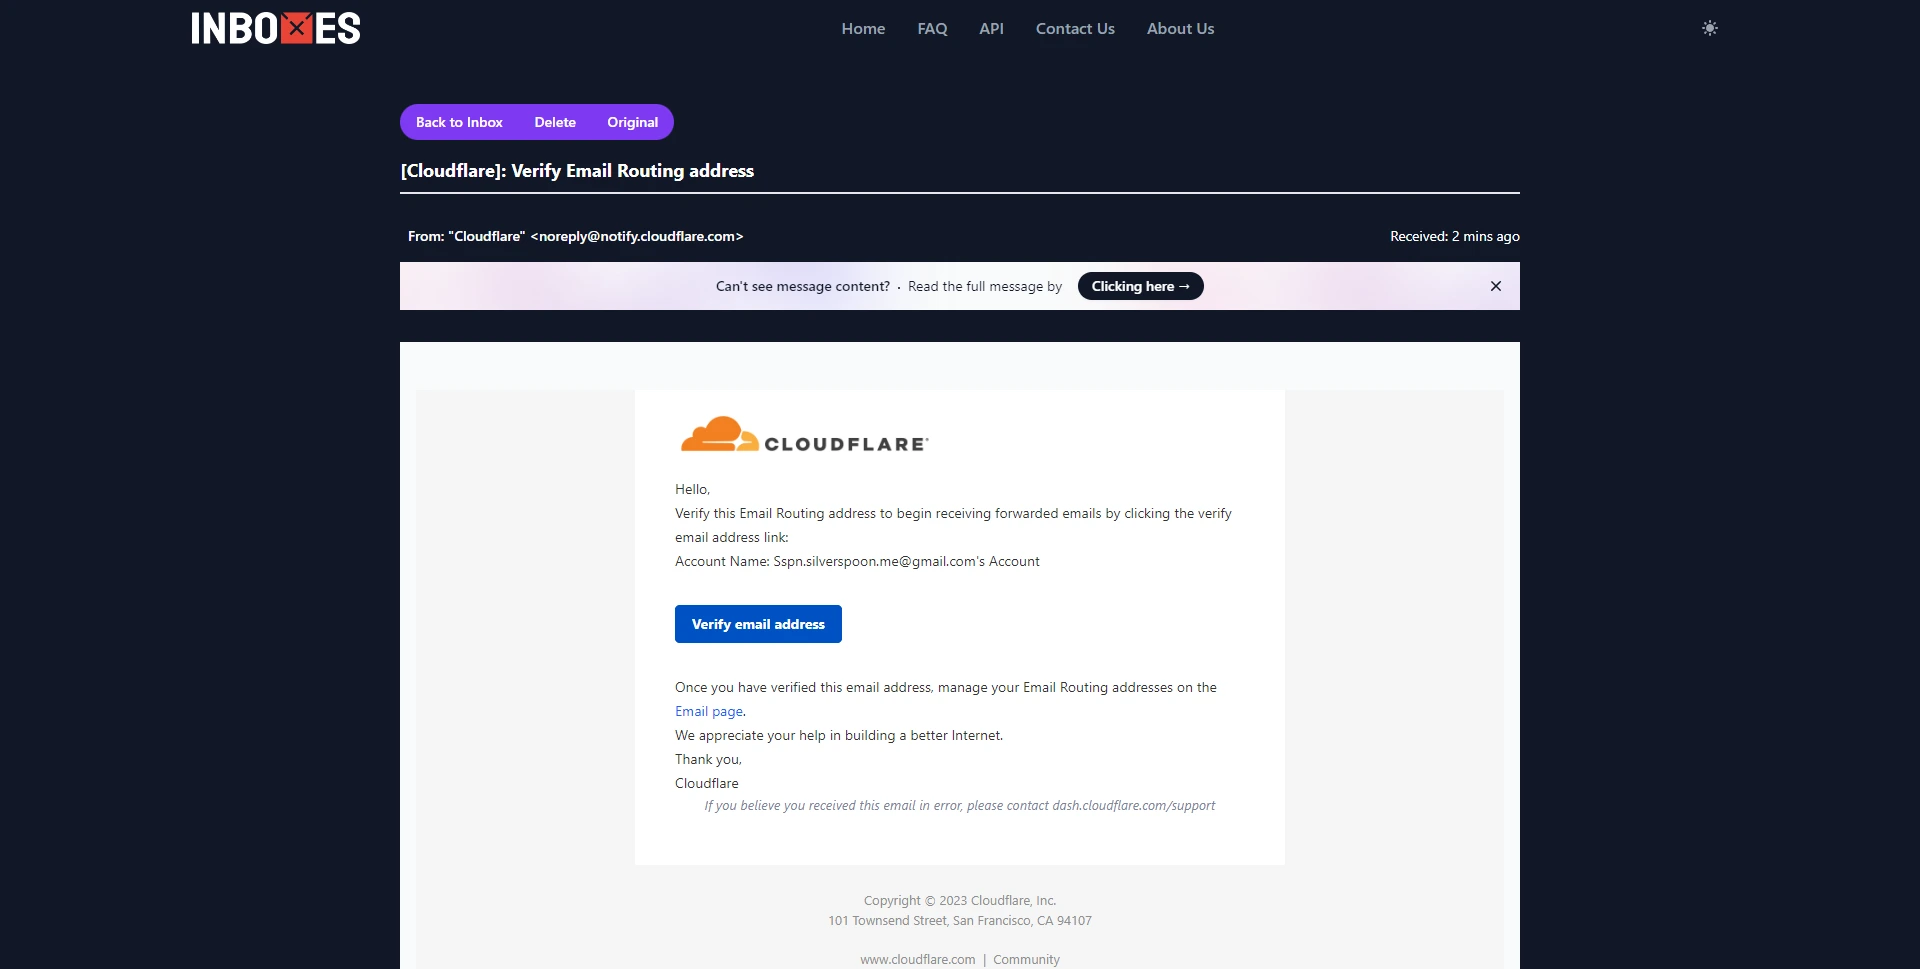 If you accept, then the email will be sent to the destination you specified.
 - Navigate to the "Destination address" here you can see and set the destination of incoming email addresses.
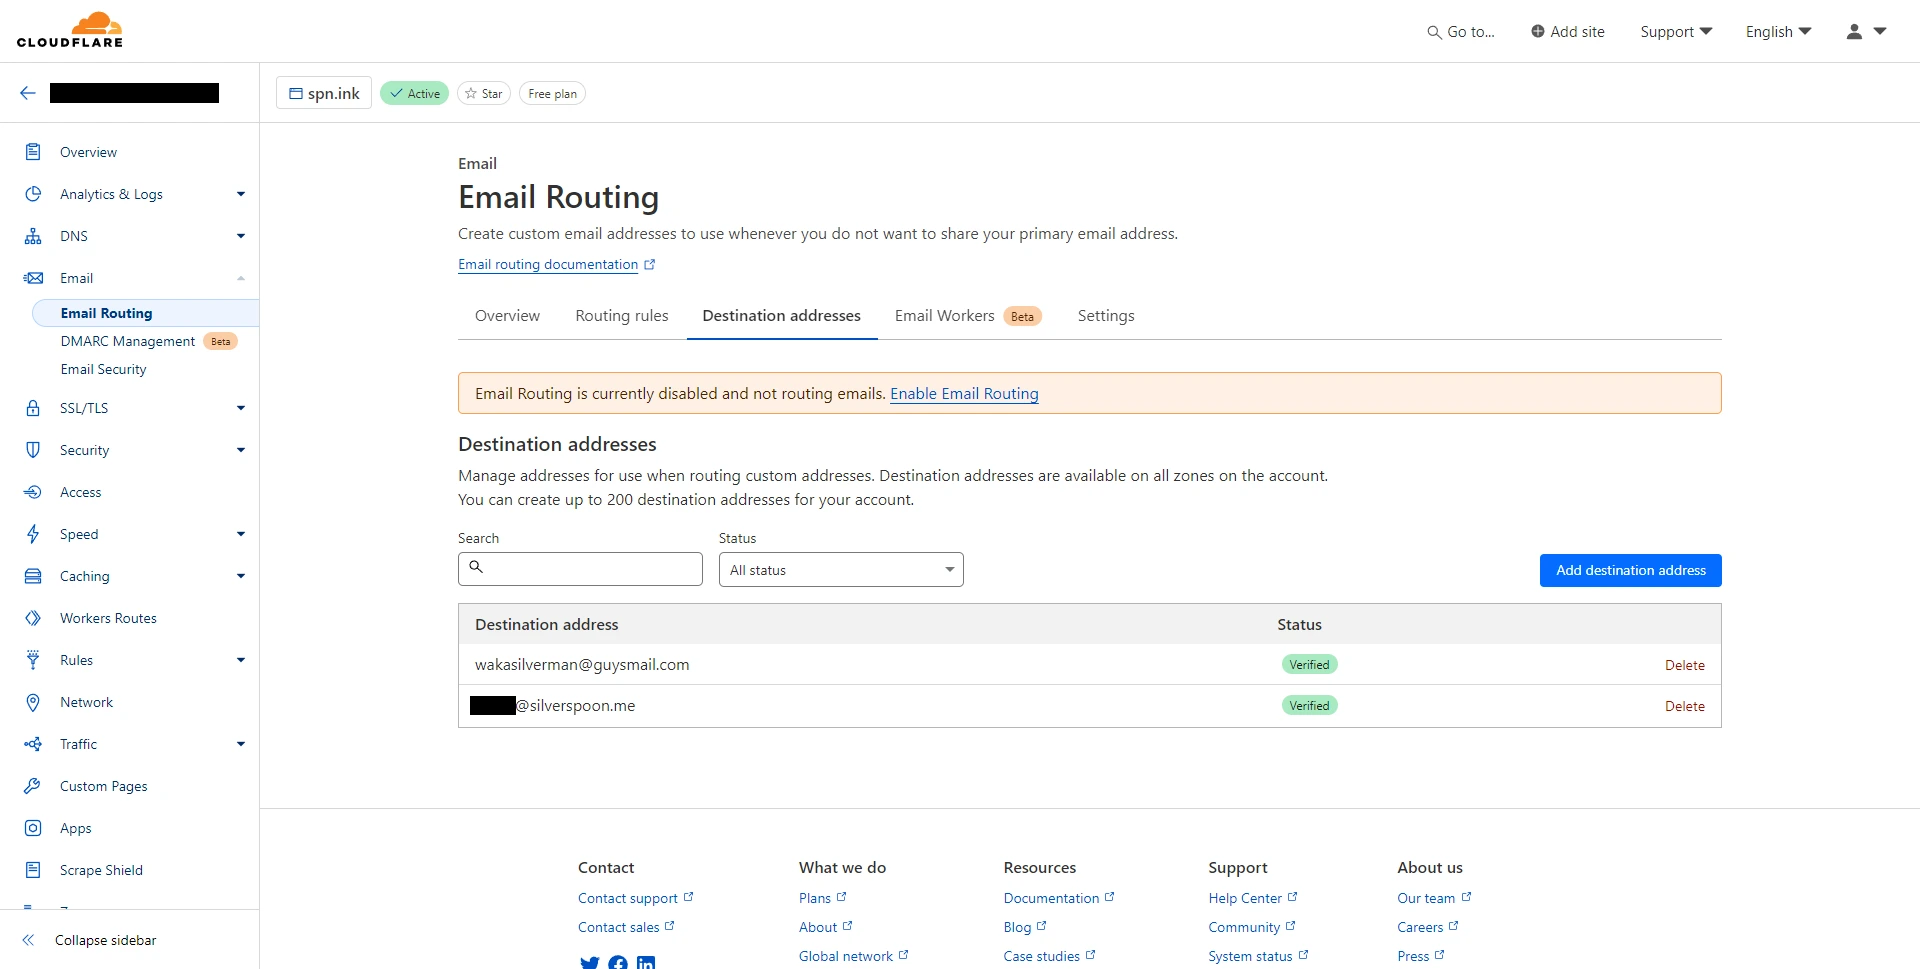 Cloudflare provides up to 200 routing email addresses for free.
 - Currently you still can't receive email, as their "email routing is currently disabled and not routing emails" notice state, because you need to configure it. Click the " Enable Email Routing" links.
- Later you will be given information about the DNS records that you need to configure.
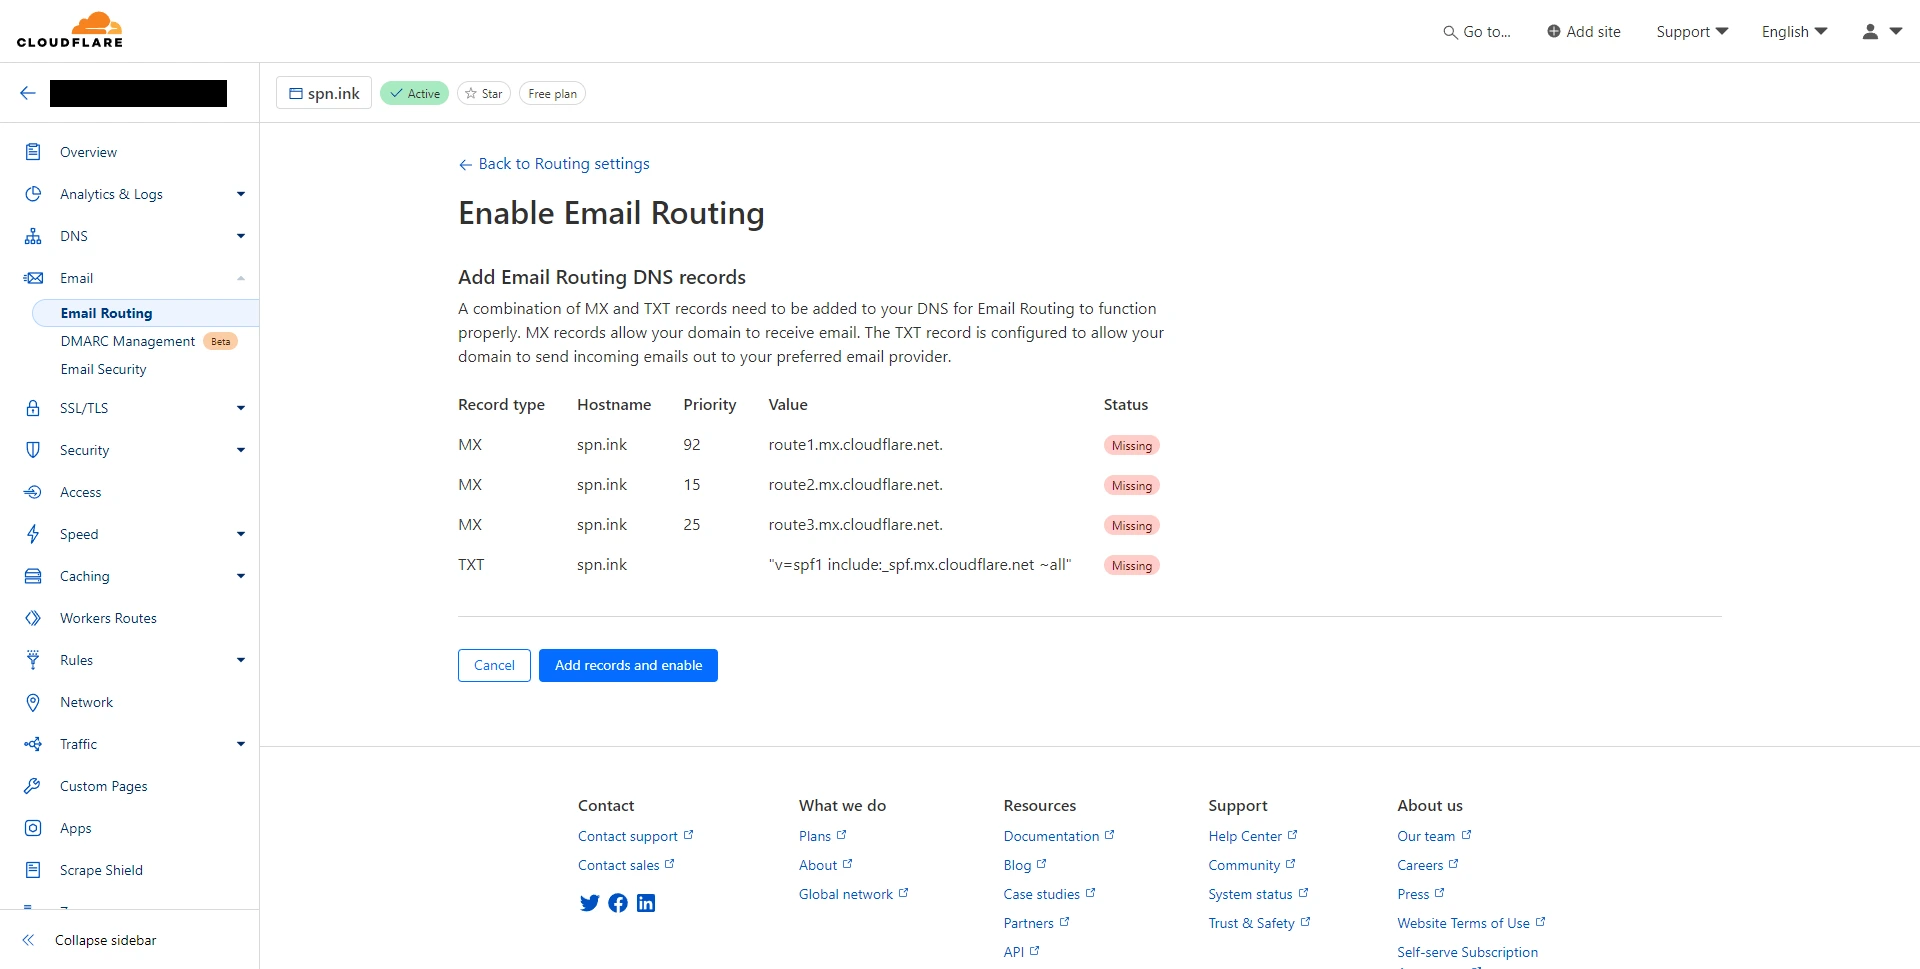 Don't worry, you just need to click the "Add records and enable" button so that the settings can be done automatically.
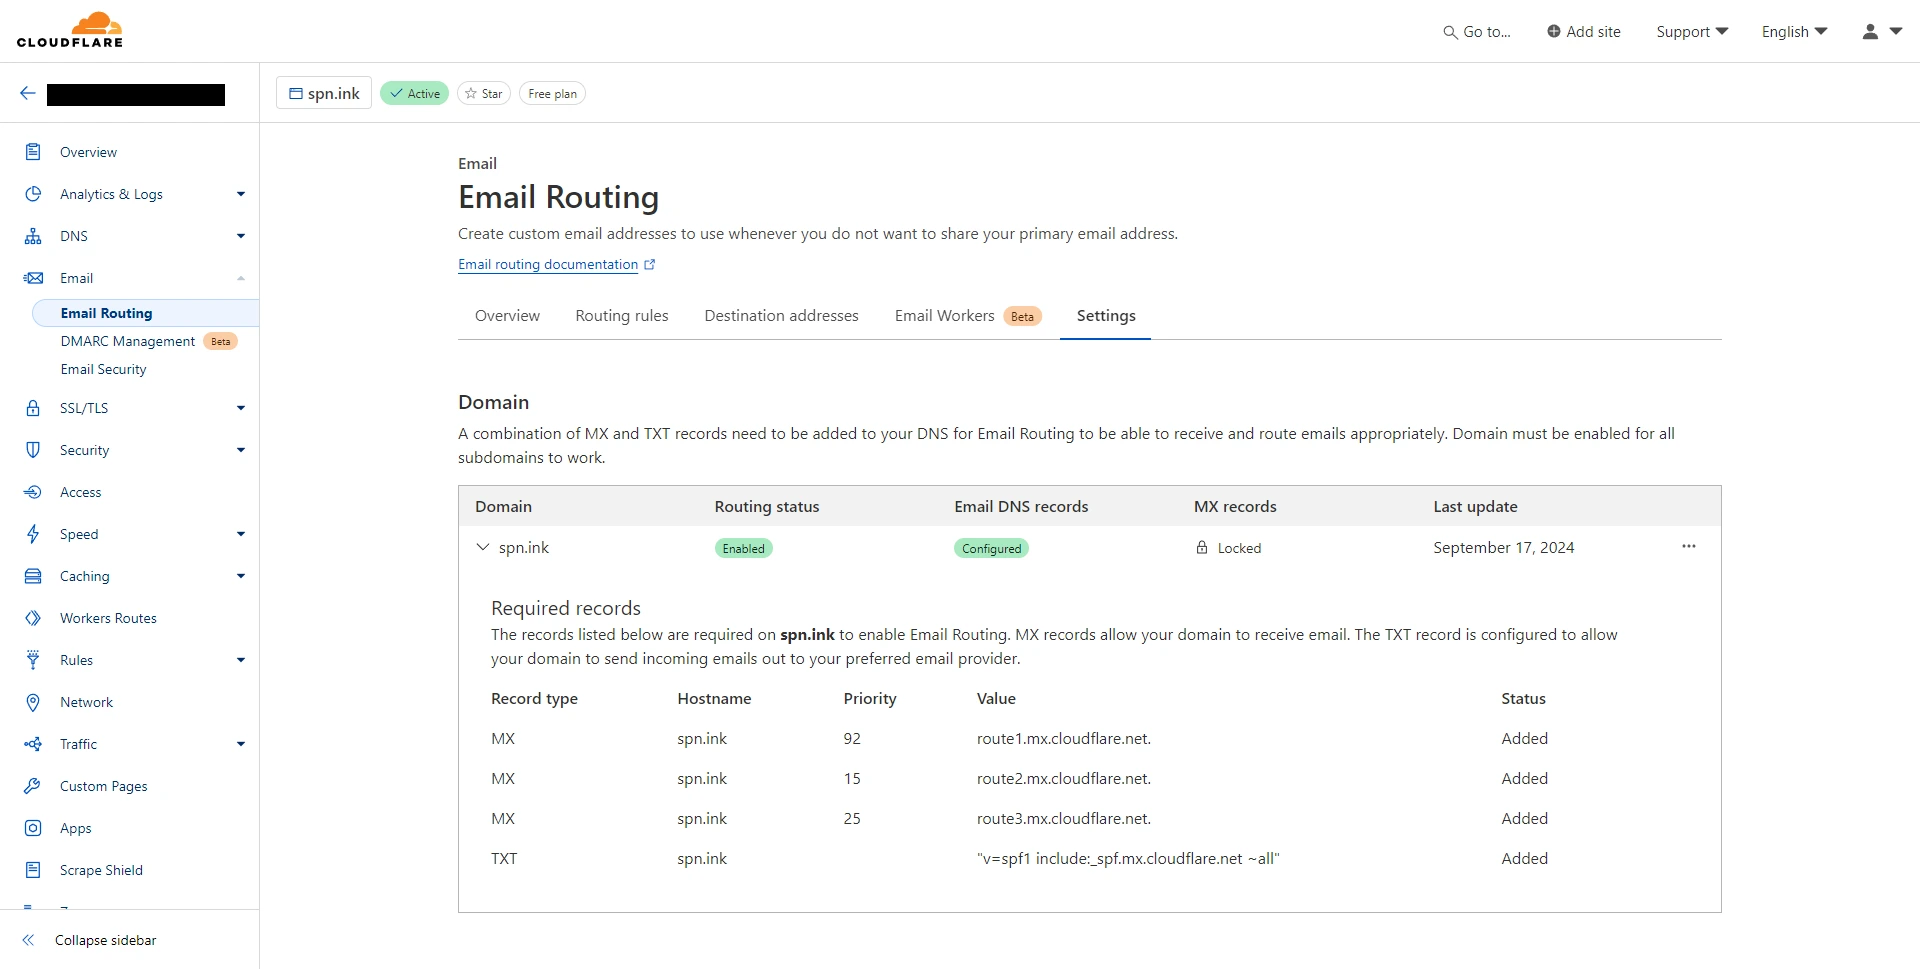
 - The settings can be said to be complete and can be used after you see the results as below.
Email routing is a product owned by Cloudflare. For further settings and customization please refer to their official documentation.
Verdict
If you are very paranoid about security issues, I suggest you combine both disposable email and email forwarding services together, so that your main inbox will never get emails from anywhere.
- On the disposable email side: You can create a new inbox with a very long and random string using random string generator, such as
yhm2uxie2fifxaqkvm6qamzzbztcsu4w@guysmail.com. - On the email forward side: You can create a new static forwarder alias, such as
waka@spn.inkwithyhm2uxie2fifxaqkvm6qamzzbztcsu4w@guysmail.comas the destination. - Whenever the disposable email address is not available anymore, you can just update it through your email forward so you won't lose access to any services. Because in terms of identity, you use the
waka@spn.inkas email address.
There are many disposable email service you can try. Please try and decide for yourself which service you like the most, because option is not limited to what we have written above.
Please note that the use of disposable emails may not be permitted on services on other sites. Also please do your own research and decide how you will use it.